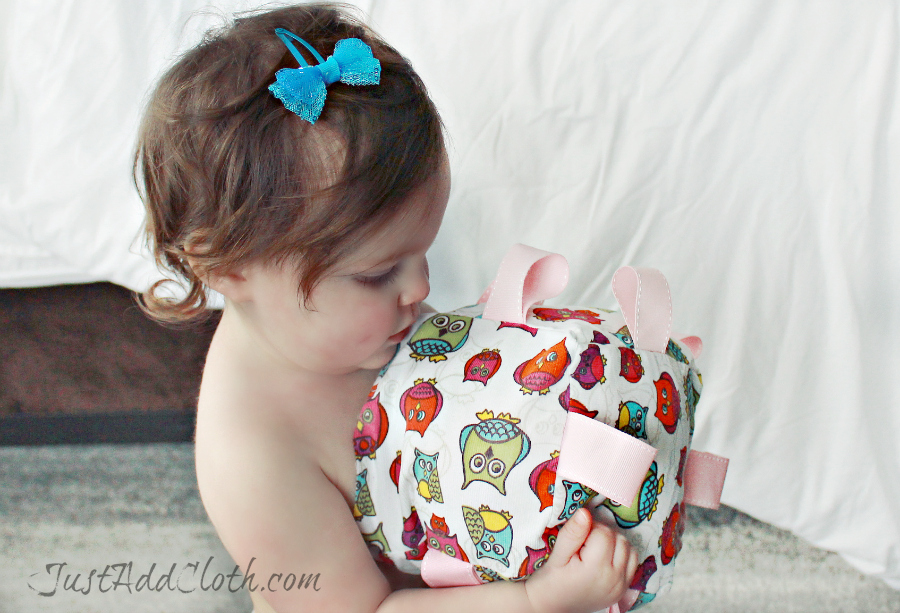
 DIY Taggie Toy
Use up those fabric scraps and old ribbons to whip up some cute toddler items!
Now, an amazing seamstress, I am NOT, but small things like simple tag blankets and toys are easy enough that even I can pull it off. Technically, you can even hand stitch the whole project fairly quickly, but a sewing machine is definitely much faster. Plus, I need to bust out my Thread Banger every few months in order to justify owning it. (Right?!)
How to Make A Simple Taggie Block for Toddlers
Disclaimer: Homemade toys are not safety certified for young children, so use caution with your materials and do not sell items without official inspection. Just Add Cloth is not responsible for the structural integrity of DIY toys.
Materials
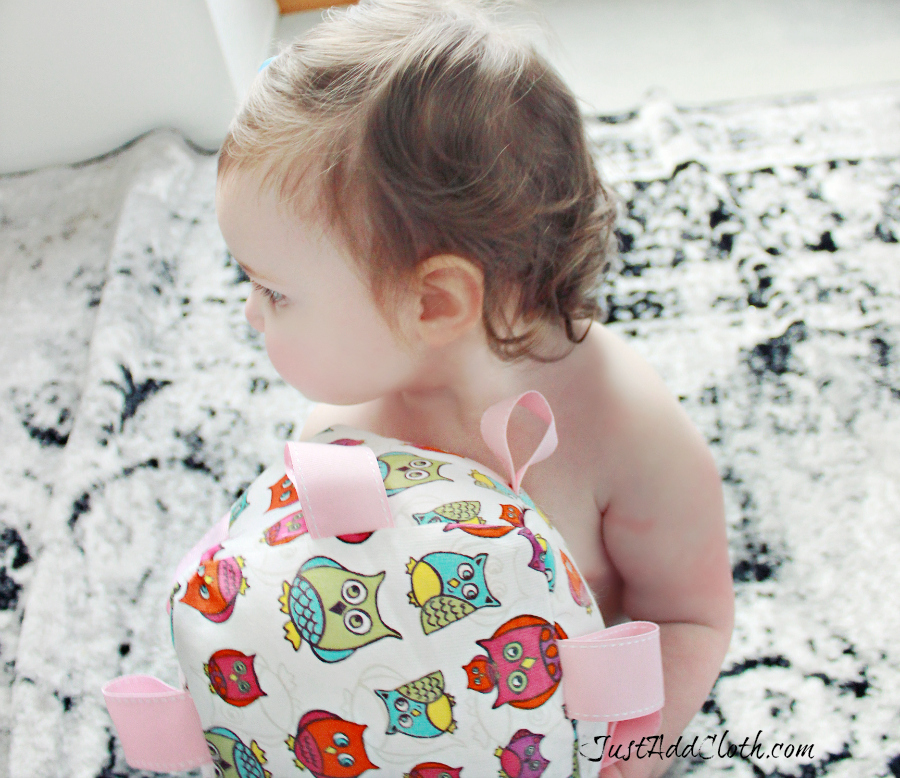
Step one, find your fabric. I’ve had this owl corduroy sitting around since 2010, so it was time to use it. (Fabric and yarn can be a real problem if you are a wannabe crafter.) I suggest pre-washing it to make sure it is clean and preshrunk.
You also need wide, durable ribbon to use as your tags. The tags are the part the kids like to grab on to.
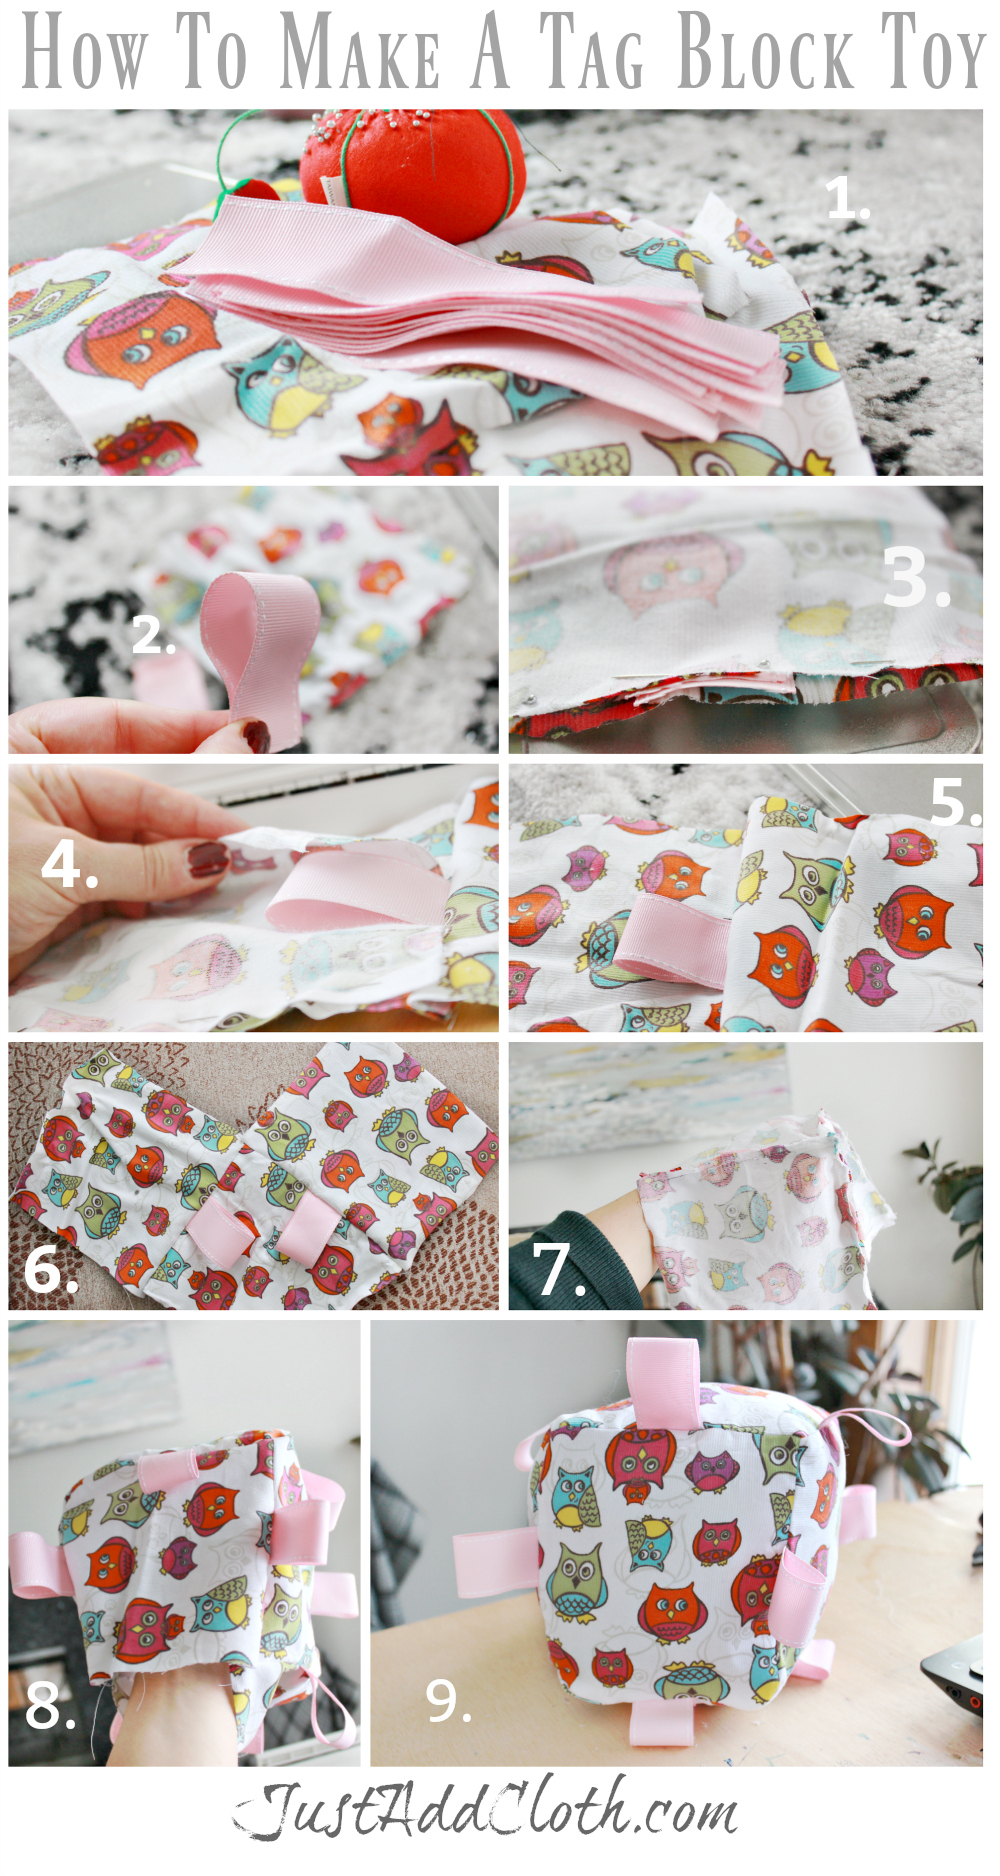
Follow along on the image below.
Measure and cut
I made this block large, so I cut six squares, with each square being 7×7 inches. Then I cut my ribbon into 13 pieces with each piece about 3.5 inches in length.
You want your tags to be loops instead of tabs so they are easy to grab, but also won’t unravel into choking hazards. (1.)
 Cut it, pin it, stitch it, stuff it. Done!
Put it together
Each fabric square is going to be a side of the block.
You want to lay a square down with the outside (pattern side) facing up. Then place the looped ribbon on the edge in the center. (2.) Then lay the second square over the top with the pattern side down. Use sewing pins to pin the edge together. The pattern sides and ribbon should all be on the inside of the fabric sandwich. (3.)
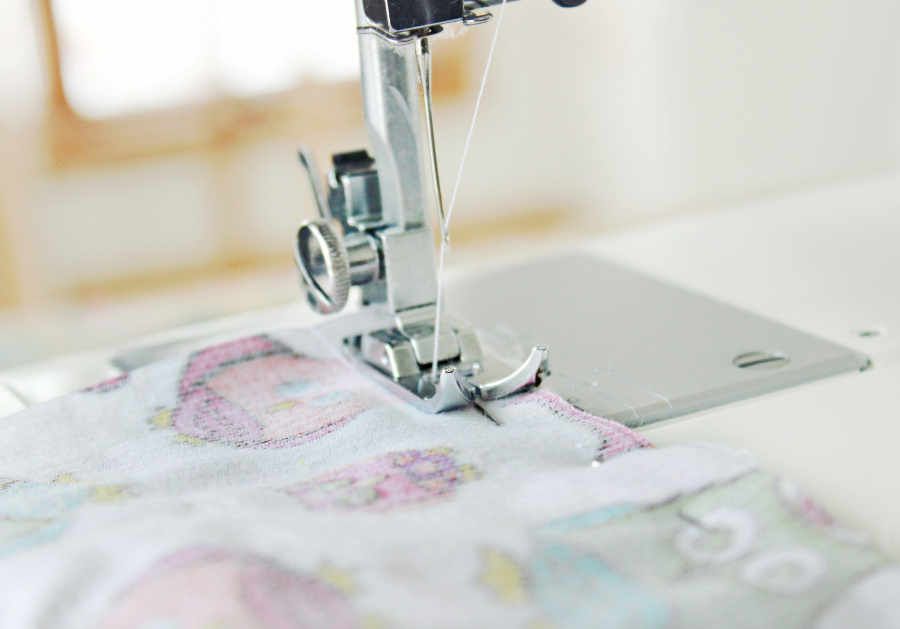 If you are new to using a sewing machine, don’t run over your pins like I do!
Run the edge through your machine with a simple straight stitch a half inch in from the edge. (Taking in a half inch on each side gives us a 6×6 in block.)
Remove pins. You now have one edge seam complete. (4.) When you turn it out, you should have a clean hidden seam with A tag loop tucked in the center. (5.)
Continue pinning edges with the inside loops, and sewing each edge one at a time going clockwise. (6,7.) I suggest only pinning one section together at a time to avoid confusion.
Continue until 12 edges are complete. Leave the 13th edge and loop undone in order to stuff your block.(8.)
Fill the Block
Turn the block right side out.
Regular poly stuffing used for throw pillows and teddy bears is fine. You can fill it to whatever firmness you prefer, though extra firm maintains a better block form.
Fold the last edge inward and tuck your last tag loop ends into it and pin. Hand stitch the last edge to finish.
And now you have a cute toddler toy and a little less clutter in your craft space. Or maybe a new life for that t-shirt depending on where you pilfered fabric from in your house. I won’t judge.
Try Similar Projects:
How to Make A Simple Taggie Blanket